


Dave
-
Posts
86 -
Joined
-
Last visited
Posts posted by Dave
-
-
Hello,
The feature has already been implemented. Please go to the Viewer&Reports tab and select the Devices or Storage details templates, and TNI will build such a report with the necessary encryption devices.
Please be noted that to display such information, remote device has to be scanned under SMB or agent with administrator privileges.
.png.2f3e935e933da6c900826131e78eb22c.png)
-
Hello everyone!
We start testing the 64-bit version of Total Network Inventory, which will replace TNI x86.

The 64-bit version and its storage are fully compatible with the 32-bit version and have the same functionality.
The improvements will be noticed by users of large networks and storages who build large reports and can reach the RAM usage limit of 32-bit applications.
Download TNI x64 Beta from this link. Looking forward to your feedback!
-
Hi!
I`m afraid that the question is not related to TNI. The program is not able to activate third-party applications. Please take a look at Microsoft Office documentation.
-
Hi!
We regret but TNI is not a monitoring tool and it is not possible to detect traffic through a server. The scanning processes are used to retrieve hardware and software information from devices.
In your case, we recommend reviewing monitoring software.
-
Hi Kevin,
We are sorry to disappoint you again but the development of the agent is planned for next year, provided that there are no priority tasks or other circumstances. 😞
-
Hello!
No, there is a manual agent available only.
-
Hi Patrice,
Yes, to scan computers successfully you need to make sure that the ports 139, 445 are open.
Please visit this page to get more information on how to scan your network devices in TSD.
-
Hi Klode,
You can do this. Simply add such devices as Custom assets and save them in your storage. The number of custom assets is not limited and the y are not counted in a license.
-
Hello!
The shown list is a list of devices that placed for scanning, but the scanning has not been done yet. Simply perform scanning and the scanned devices appear on your network tree.
-
Hello,
We have an idea to implement SSL configuration into the program and this feature is in our to-do list. But unfortunately, it is not possible in the current version of NO.
-
Hi,
If we understood you correctly, a resident agent should suit your purposes.
Before setting up a resident agent, you need first set up a communication method so that the agent can send scan results.Then go to the Scanner tab, switch to the resident agent section on the sidebar and add a Profile with configuring it. You can also need to add Schedule tasks so that the agent could execute scanning tasks and send scanning results at the specified schedule.
Then export the agent with profiles by clicking the appropriate button to a remote computer. Please note that all configured profiles will be exported. You need to find the required profile by opening the configuration files and finding it by the Profile name inside. When the necessary conf file is found, rename the name of the file from the long name (for example) tniwinagent_{DAD9B996-A618-4498-B958-BC507CA2BE7B}.ini to tniwinagent.ini
Launch the agent in the command line:
tniwinagent.exe /install /start /testrunThen the agent will start as a service, perform scanning and send scanning results with the corresponded configuration.
Please note that the described export method is displayed for a resident agent that is exported and manually started. If you perform actions from the main TNI module, then the configuration processes are greatly simplified.
-
Hello.
That`s right. In this case, we recommend using agents for remote scanning. Simply configure a resident agent that will send scanning results to a shared resource and then you need to configure the main module of the program in which you specify to import these results to.
-
Hi!
Most likely the program is unable to capture the changes entered while taking a macro shot.
We regret, but we cannot advise you any solution here.
-
Hi Krath!
The correct entries must be entered in the following format:
\\server4\common\infosys\tnistorage
\\192.168.18.10\common\infosys\tnistorageIt is possible that you have access issues. The resident agent performs actions with NT AUTHORITY\SYSTEM rights, which may be not enough for working with a network filesystem that requires authentication in a domain. Even though, the resource can be opened for all domain users.
To solve this matter, please try creating a new user with minimum privileges for this. Then go to Data transfer that is used in the resident agent and specify a name and a password for the required method.
-
Hi!
You can try the following solution:
1. Download the Office Deployment Tool for your version of Office.
2. Launch it and save the Click-to-Run setup.exe to the folder of choice.
3. In TSD, add the newly created setup.exe to the Software storage as a multi-file installer by ticking the checkbox and specify the path to the Office distribution folder (if you don't have the distribution, the folder where the Click-to-Run setup file is).
4. In the Software editor, click Configuration to expand the settings and configure the XML using the panel or manually (click the icon on the right for Advanced). Set a comfortable timeout for the installer.
4a. If you don't have the distribution files, make a test run with the /download parameter: the files will be downloaded to the Software storage. The same timeout value will be used.
5. Deploy using parameter /configure. -
We are aware of such a situation but currently, due to the pandemic, we are focused on our other products. We are planning to continue developing the product as soon as possible.
-
On 1/8/2022 at 7:29 AM, Uzan said:
can TNI scan ubuntu pc?
Hi Uzan,
Yes, Ubuntu is a part of Unix OS. If all requirements are met, you can scan computers with these systems.
-
Hi!
Unfortunately, we don't have any good news on this matter.
Our team inspected the query and found out that it can be difficult to implement this in the current version of TNI. So, we cannot delight you with that.
It is possible that this feature may appear in our other product. -
Hi!
To analyze the issue we`d need more information.
Please send us details of your actions performed and your general conditions at support@softinventive.com
-
Hi Clay!
Nevertheless we will post the information for other users.
To scan your network devices without AD information you need just to specify the network range in the Scanner tab and start scanning. Please note that in this case, the AD synchronization must be excluded and similar tasks excluded as well.
-
Hi Gene!
Unfortunately, it`s not possible in the current version of TNI. We have forwarded your request to our developers and it may be implemented in the future updates.
Thank you for your request!
-
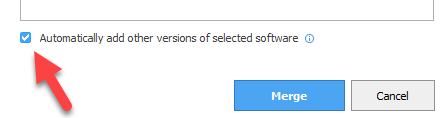
Hi!
Please merge the required programs in the Software accounting tab and then attach a license to the group.
Please don`t forget to tick the specified option as it`s shown on the screenshot.
-
Bom Dia,
É altamente possível que você esteja usando uma versão quebrada do TNI. Baixe a versão mais recente da TNI em nosso site e reinstale o programa.
-
You are right, but TNI is unable to rely on the data that contain such information, due to their absence. That is why we recommend entering the warranty information manually.
Windows update MSU extension deployment
in Total Software Deployment
Posted
Hello!
Unfortunately, the *.msu deployment feature is not available yet and there is no way to deploy such files. We are planning to add the support of the files in the future updates.